Like many people, I am a harsh critic of photos of myself. Consequently, I do not like having my photo taken. My belief that I am not photogenic likely has little to do with how I look in photos and more to do with how our brains process images of ourselves vs. others. Still, it puts me in a tough position when I have to provide a headshot (e.g., for my department’s website, fellowships and awards, and professional service activities).
Inspired by Carol Dweck’s research on the power of mindsets, I decided to re-frame how I approached my aversion to being photographed. Rather than thinking of myself as “someone who looks bad in photos,” I approached being comfortable in front of a camera as a learnable skill. I browsed headshots of professors, read articles online, and consulted friends who work in the fashion industry to learn what makes a good headshot and how to get one for myself. Here’s what I learned.
First, the purpose of a headshot is to show what you look like. This is an obvious point, but an important one to keep in mind as you make decisions about your headshot. Your photo should be an accurate representation of you. Someone who has never met you should be able to recognize you based on your headshot. Second, your photo should look like you at your best. You should be dressed professionally. Your demeanor should be friendly, and there shouldn’t be any distracting or visually confusing elements in your photo. The following tips stem from these two basic purposes.
-
What to wear:
- Avoid patterns and bright colors.
- Stick with dark colors; white sometimes looks washed out in photos.
- Avoid distracting jewelry like large earrings and necklaces.
- If you choose to wear makeup, go for a neutral look. My friend in the fashion industry explained that blemishes become more obvious in photos than in person and makeup becomes less obvious, so makeup may be helpful. But, avoid heavy eye makeup, colorful eye shadow, etc.
-
What to do while getting your photo taken:
- Face the camera with the side that shows more defined characteristics. For many people, their “good” side is the left side because the left side of the face tends to be more expressive than the right side.
- Turn your body three-quarters and look back at the camera.
- Stand or sit tall (avoid slouching) and point your chin down slightly
- Try to look and feel comfortable (e.g., by chatting, thinking of something that makes you feel happy, etc.). One strategy to help you look comfortable is to exhale while the photo is being taken.
- Experiment with a few different poses and facial expressions (e.g., smiling vs not; left vs right side; standing vs sitting)
Armed with this knowledge, I arranged to have my photo taken with John Zhu, the Graduate School’s Senior Public Affairs Officer and Communications Strategist. John provided some of the tips above and offered the following tips for people taking their own headshots, or having friends take their headshots.
-
How to take the photo:
- Most smartphones are equipped with good cameras and can take great photos as long as there is good lighting
- Use a tripod, especially if you are shooting with a phone
- Avoid using the zoom, which reduces the photo quality
- Take several shots in a row. That way, even if you blink, you should still get a shot with eyes open.
-
How to manage lighting:
- Avoid using flash and instead find a setting with natural light. Outside during the daytime works well, especially in the early morning or late afternoon.
- Avoid shooting outside on a sunny day at noon; the harsh light coming from directly overhead will create a lot of shadows.
- Look for uniform lighting (i.e., even shade or even brightness). A place where light and shade are interspersed (e.g., under a tree) could throw uneven lighting on your face.
- If shooting inside, find the best-lit spot you can. Look for a naturally lit spot like an atrium or lobby area rather than a room with fluorescent overhead lights.
- Try to position the main light source so that it casts on your face at a 45 degree angle. Do not stand directly in front of the main light source. Doing so will make your background bright and your foreground dark.
-
Where to take the photo:
- Use a plain background or a uniform, uncluttered background (e.g., library stacks, a long hallway, outside with buildings far off in the distance)
- If you are shooting with a backdrop (e.g., against a wall), don’t stand too close or the dark shadow your body casts will make you look flat
- If you are shooting against a background with buildings or other objects, position yourself as far away from the background as possible. This will help put the background out of focus, making it less distracting.
- Avoid distracting objects in the background, like a tree “poking into” your head, a window or door that unintentionally frames your body, or signs with words
-
How to select and edit an existing photo:
- Choose a good-quality photo of just you (no other people and no animals)
- Crop the photo so that your face takes up about 60% of the frame
- Avoid selfies, which look unprofessional and are often taken at extreme angles
- Use filters and otherwise adjust colors, but use a light touch
-
Some examples:
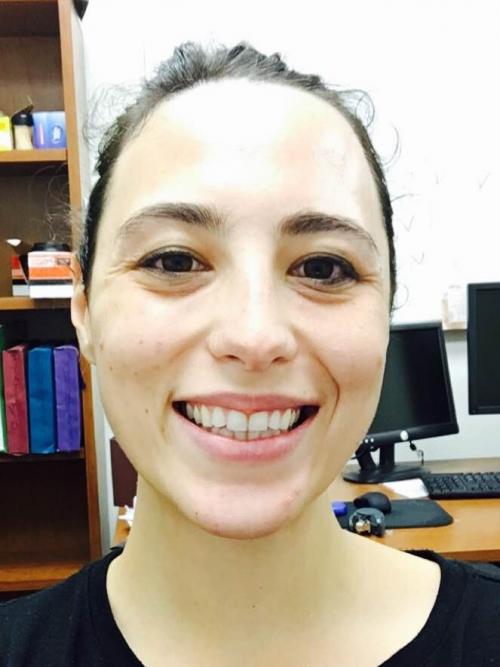
Bad: This photo is bad because it is obviously a selfie. There is harsh lighting and a cluttered and distracting background.
Better: This photo is better, but still bad because it is blurry. It is obviously cropped, and cropped poorly. Plus, there is a distracting background object (i.e., branch sticking out of the head), and it is lit from behind, so the face is hard to see.
Best: This photo works well because I look professional, but I also look like myself. There is nothing distracting or odd about the photo and my face is visible and evenly lit.
Once you have a good headshot, remember to keep it up to date. If you are going on the job market, your headshot should not be more than two years old. If you have made any significant changes to your look (e.g., changed hair color, lost or gained weight), consider updating your headshot. Good luck!
Author
Hannah Moshontz de la Rocha
Ph.D. student, Psychology & Neuroscience
Hannah Moshontz is a Ph.D. student in psychology and neuroscience who studies how and why people give up when they are working on important tasks and goals.